An app should be easy, right? Many people ask how to use the My Disney Experience app- and that’s because it can be a bit complicated sometimes. Let’s dive into how to best use it!
So, you’re going to Walt Disney World? What is the next thing you should do?
Download the My Disney Experience App! I know, it doesn’t feel as magical when you start talking tech and how to use it on your Disney World vacation. But you will be using the My Disney Experience app, every day, practically every moment you are in the parks (well not every moment, but you will use it often and for all of your important Disney World plans).
This blog is all about How to Use the My Disney Experience App.
*Disclosure: I only recommend products I would use myself and all opinions expressed here are our own. This post may contain affiliate links that at no additional cost to you, I may earn a small commission.
Let’s dive into how to use the My Disney Experience App and answer the basic, technical, and frequently asked questions so you will be ready to enjoy your Walt Disney World Vacation like a pro!
Complete Guide: How to Use the My Disney Experience App
The My Disney Experience app is a powerful tool that can enhance your visit to the Walt Disney World Resort. From managing your dining reservations to accessing interactive park maps, checking wait times, show times, and character meet and greets, this app puts all the information you need right at your fingertips.
In this guide, we will walk you through the steps (starting with the easy stuff and then the complicated) of using the My Disney Experience app, ensuring that you make the most of your magical experience. Here we goooo…….
1. Downloading and Setting up the My Disney Experience App
How do I download the My Disney Experience app?
Simply search for “My Disney Experience” in your device’s app store or Play Store (it’s available for iOS and Android) and tap on the install/download button.
How do I set up my account on the app?
Next, you will set up your account. Open the app and follow the prompts to create a new account by providing your email address, creating a password, and accepting the terms and conditions.
Be sure to check out my free pdf download: 5 Essential My Disney Experience Tools. Just fill out this form to get the PDF direct to your email!
|
|
2. Linking Your Disney Resort Reservation and Tickets
How do I link my Disney Resort reservation to the app?
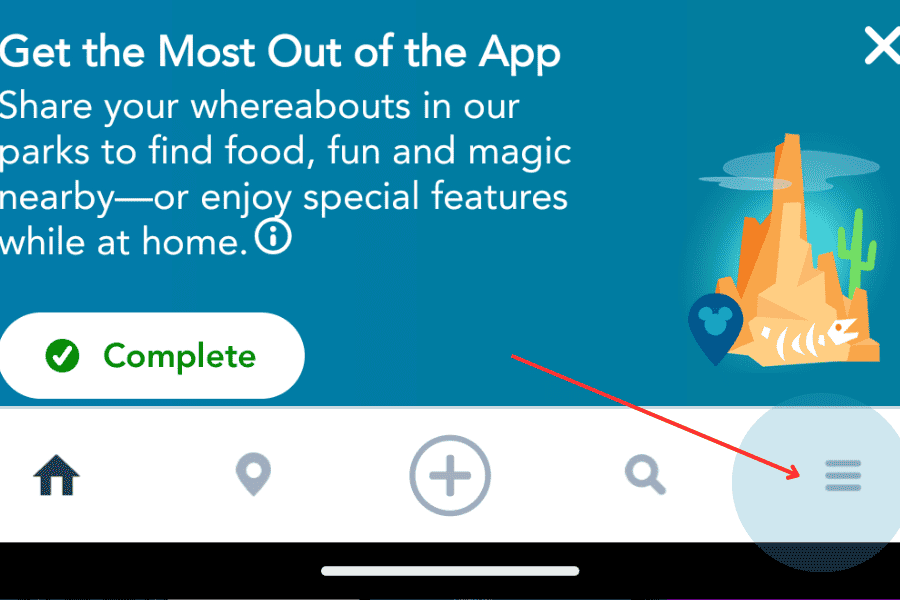
First, go to the bottom right “hamburger menu” (the three diagonal lines at the bottom right of the home screen). Tap on the “Resort Hotel” option within the app’s main menu, then follow the instructions to link your Disney Hotel reservation by entering your confirmation number and last name. If you don’t know your confirmation number go back to the email sent to you by Disney or your Disney Travel Planner when you made your resort (hotel) reservation. In most cases, if you booked a vacation package through Disney or a Disney-linked Travel Planner, this will load automatically.
How do I link my park tickets to the app?
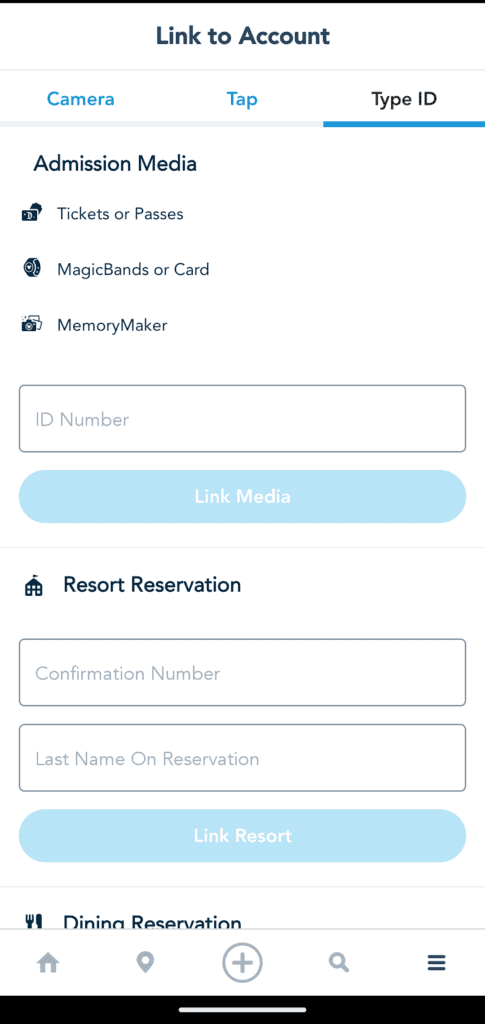
To link your tickets go to the bottom right-hand corner of the My Disney Experience mobile app. Select the “Tickets and Passes” option, then follow the prompts to link your tickets by scanning the barcode or manually entering the ticket number. You can find your ticket number in the email sent to you from Disney/ your travel planner when you booked your tickets. If you have a package booked through Disney or a travel planner this may already be done, or you may have to enter it as above.
You can also use the above screen (the Resort Hotel option) and link your tickets and your Magic Bands there.
What are Magic Bands?
Magic Bands are RFID-enabled wristbands that used to be included in your Disney Resort reservation but are now sold separately. They can be used in place of tickets or the My Disney Experience App while in the parks for park entry, Lightning Lane/ Genie + use, and even for entry to your Disney Resort Hotel room. They are not necessary though, so it’s a personal preference whether or not you would like to purchase a new Magic Band or link a Magic Band you used in the past.
3. Exploring Park Information and Interactive Maps
How can I access park information on the app?
You can see important park information by tapping on the “Park Hours & Info” section. At the top of the page if you choose Park Hours you can see the current, or future, hours of each of the four Walt Disney World parks. If you choose “Today” you will see all of the events, shows, and parade hours at each of the four parks and even at Disney Springs (the entertainment district outside of the parks).
How do I use the interactive maps and find wait times for attractions within the app?
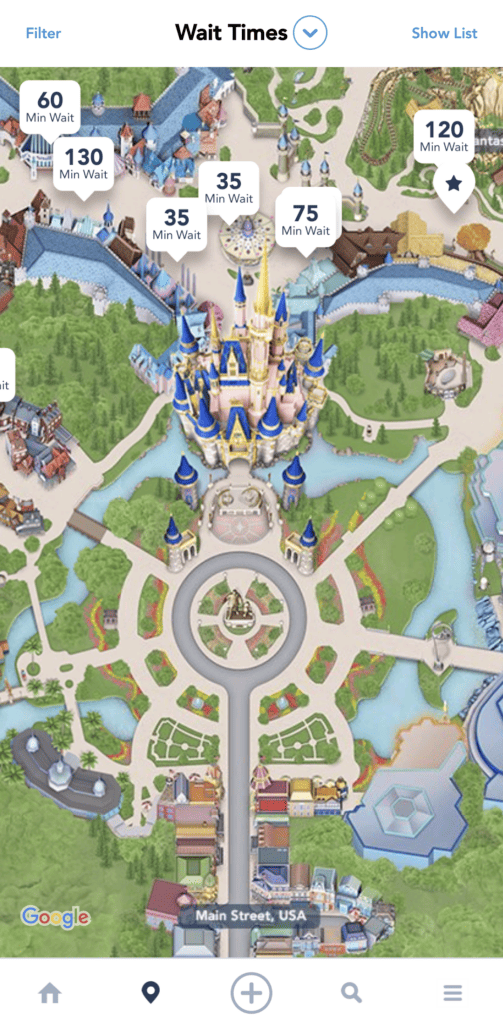
At the bottom of the screen, tap on the “Map” icon to access a detailed, interactive map that allows you to locate attractions, lands within that park, characters, dining, entertainment, restrooms, events and tours, photo pass locations, guest services locations, shops, resort hotels transportation, and wait times for the attractions.
This map automatically goes to Magic Kingdom but if you want to check a different park you can manually move around or (this is simpler) go to “Filter” at the top left of the screen and you can choose which park you want to see.
The default category is wait times but you can change to any of the above categories to see their locations (and wait times if that applies) on the map. If you would like to see any of this in a list format you can choose “Show List” at the top right.
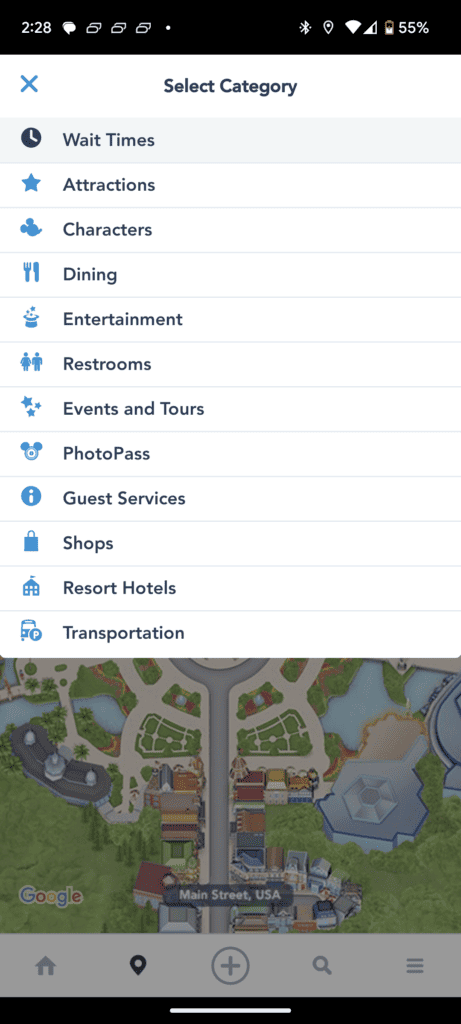
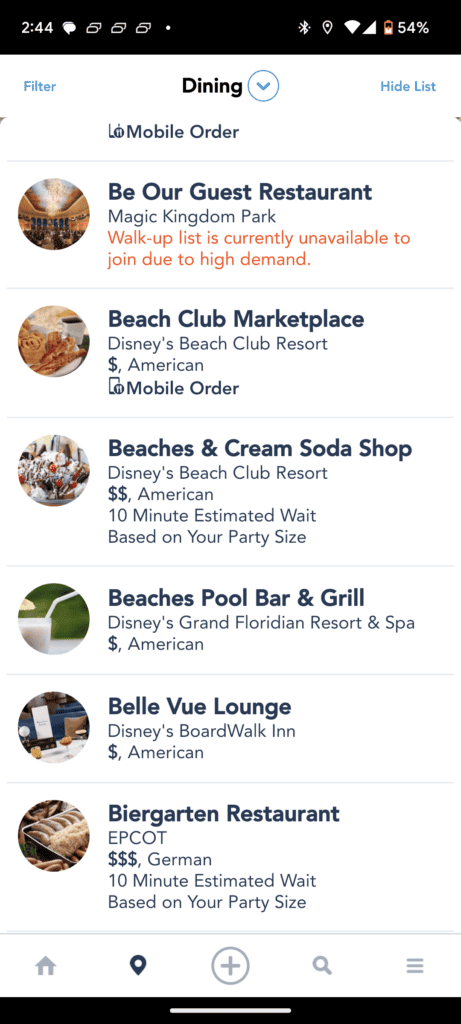
For wait times, a list will appear displaying the wait times in order of shortest wait to longest wait. In terms of characters, the drop-down list will show you alphabetically what characters you can find where. The dining drop-down list shows you an alphabetical list of the dining options, where they are located, the cost (using $ symbols), and what type of food they serve. You will also see notifications if a restaurant is too busy (in high demand) and is therefore not using the walk-up waitlist. The walk-up waitlist is where a table-service restaurant at Walt Disney World may be able to seat you if don’t have a reservation and can add you to a waitlist. It’s so important to plan your Disney World vacations ahead of time and that includes trying to make any table service reservations well ahead of time if you really want to get into a certain restaurant.
4. Making Dining Reservations and Mobile Ordering
How can I make dining reservations through the app?
To make Dining Reservations tap on the “+” at the bottom of the app’s main menu. After that choose “Check Dining Availability”. You will then have to enter your email and password again as it is technically taking you out of the My Disney Experience app but you won’t need to do anything other than sign in.
You will then enter party size, date, and time (or you could choose “all day” to see all openings). This is a relatively new update as you can see all of the available openings and make decisions based on that versus the past version only allowed you to choose one time range for each search. The restaurants then appear in alphabetical order, with price range and open times appearing.
After you choose your restaurant you can enter any special diet or dietary requests, as well as accessibility requests. Some restaurants ask for a credit card guarantee and for those you will have to enter your credit card information to make the reservation.
How do I use the Mobile Ordering feature?
Tap on the “+” option within the app’s main menu, then select “Order Food”. A screen will then pop up with the options available at the park where you are located. The Magic Kingdom is the default if you are not in the park or your location services aren’t working. If you want to look at a different park, resort, or Disney Springs, simply use the “Filters” menu under the map. You can also choose from “Available Now” to see which mobile order location you can order from immediately, or choose “Nearby” to see what mobile order locations are around you.
At the top left you can toggle to “Schedule for Later” if you know you want to eat from a certain location later in the day. Some people like to plan ahead and sometimes you have to when the parks are busy!
5. Using Genie and Making Genie+ Selection
This is one area where using the My Disney Experience can get a bit tricky.
Disney Genie is complimentary, while Disney Genie+ is a paid attraction reservation system. Genie+ replaced the prior FastPass+ system that was in place before 2022.
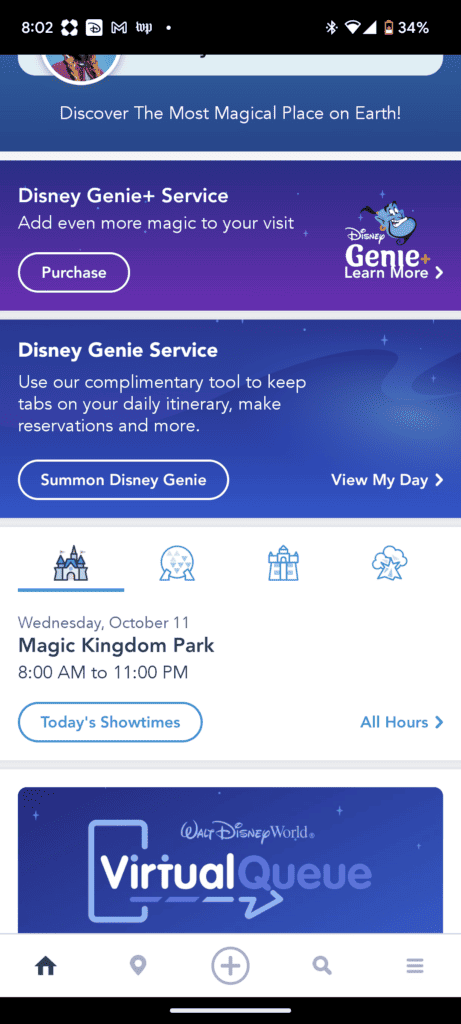
How can I use the free Genie to plan my day?
Genie is marketed as a complimentary trip-planning service. On the Genie screen, they have a “Tip Board” section, and a “My Day” section.
Tip Board
The tip board is a hub of information for your unique day. It features showtimes, dining times, and estimated wait times. You can order food or make dining reservations in this section too. You should individualize your Tip Board so that the showtimes and wait times are shown for the things you are interested in doing on your Disney day. The My Day section is where you can put in your favorite things so that your Tip Board is unique to you.
The problem with Genie is that it will often guide you to where Disney Parks want you to go because they are hoping to disperse the crowd, but it might not match your goals or even make sense in your day.

My Day
The My Day tab is where you can see the plans you have already made. In this section, the app will also make recommendations (sometimes helpful, sometimes not) and you can view forecasted wait times. If you want to view a different day choose “change day” in this section at the top of the screen next to the current date.
This section is also where you can tell Genie what is important to you when it comes to attractions, dining, and shows. You can modify or swap out recommendations by tapping the menu icon on any item in the My Day sections and following the prompts.
How do I make Genie+ selections through the app?
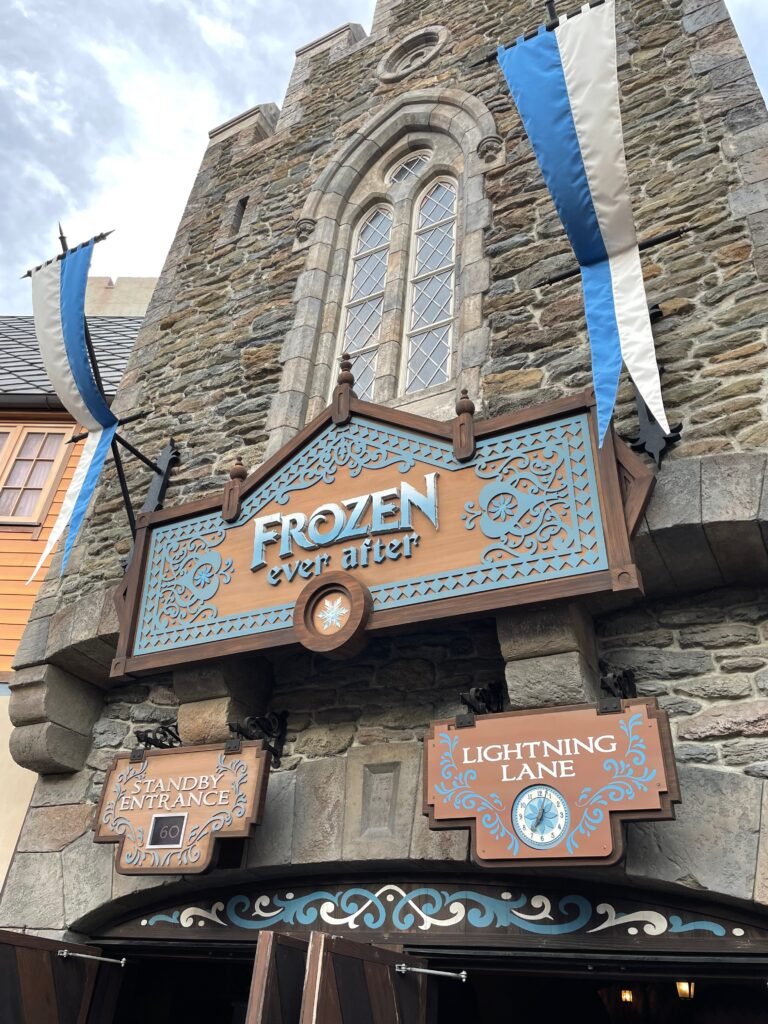
Genie+ is the paid service at both Walt Disney World and Disneyland. You can purchase Disney Genie+ to reserve an arrival time at more than 40 attractions at Walt Disney World and more than 15 attractions at Disneyland. Simply use the Lightning Lane entrance to bypass the standby queue.
To purchase the Disney Genie+ service you simply go to the home screen and look below your name and you will see the “purchase” button. Tap on this, then follow the prompts to select desired attractions, choose available time slots, and confirm your selections. You will see LL as noted in the screenshot above on your Genie Tip Board which shows you what Lightning Lanes are available and what time slots are available. Select an option and it will prompt you to complete your selection and make your Lightning Lane reservation. Lightning Lane rules can get complicated, check out my planning and Genie+ blogs to learn more.
There are also Individual Lightning Lane selections you can opt to pay for certain popular individual attractions. This can be done from the main home screen. You can do this with or without purchasing Genie+.
Other My Disney Experience Features
The above functions are the most important for your trip but here are some others that you may need:
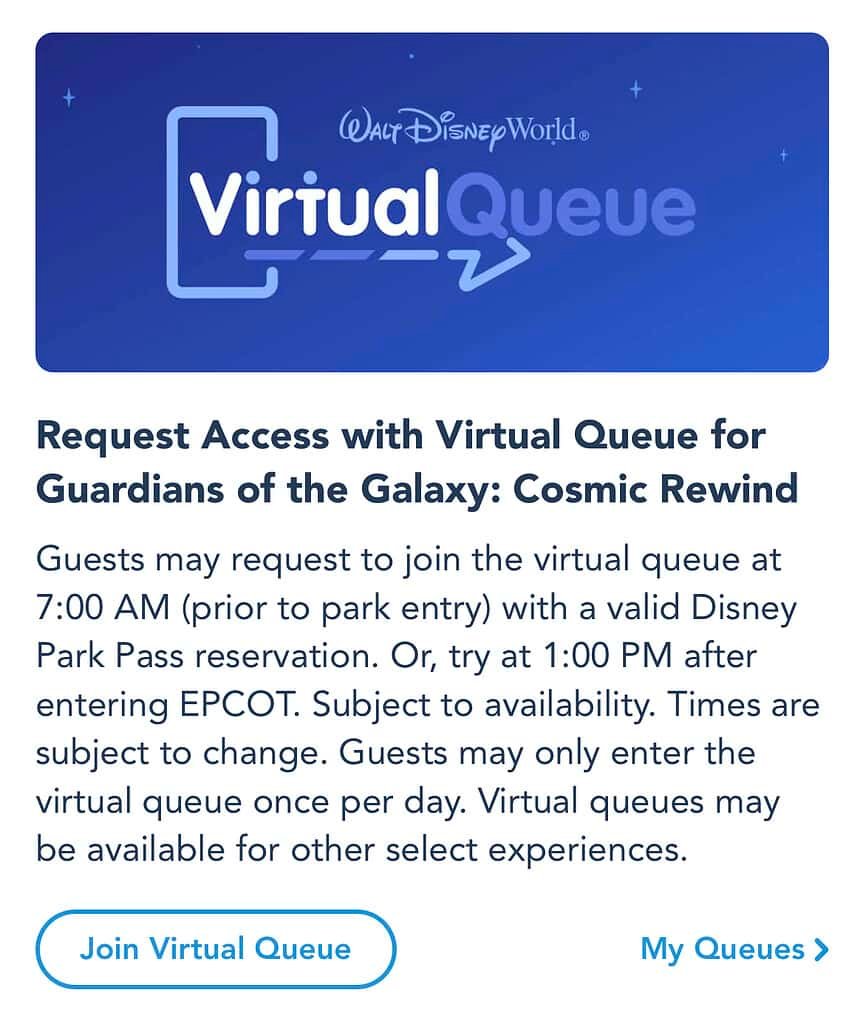
Virtual Queues
When Walt Disney World opens a popular new attraction they often use a virtual queue system via the My Disney Experience app. This is a virtual line that you can join at certain times of the day, resembling a lottery system.
Disney Photo Pass Lenses
These are fun lenses you can add to enhance your Disney photos. Just for fun but definitely worth checking out!
Disney Magic Mobile
Using the section of the app allows you to use your phone as your ticket, Magic Band, Hotel Key, and Genie+ Reservation scanner.
Merchandise Mobile Checkout
Another one of the helpful benefits of the My Disney Experience app is being able to skip the checkout lines at crowded gift shops. Certain shop locations will allow you to scan your items and check out virtually so you have more time for magic!
Photos

Ride photos and Photo Pass photos are all stored on the app so no need to worry about accessing your favorite vacation memories. Just be sure to download these from the app within 30 days of the end of your trip so you don’t lose them
Other options include a chat function, transportation details, and play Disney parks games. You can also order a Minnie Van- Disney’s own private ride-share option. It’s more expensive but they can drop you off a lot closer at certain parks (Magic Kingdom), are safe, and are driven by friendly and helpful Disney Cast Members!
The My Disney Experience app is a helpful (and actually essential) companion for your visit to the Walt Disney World Resort. By following the steps outlined in this guide, you can easily download, set up, and become familiar with the app ahead of time. Navigating the My Disney Experience app can be a bit tricky so take some time to review this post and practice before you arrive arrive. Happy exploring!
This blog was all about how to use the My Disney Experience app.
You May Also Like:
Disney Genie +: Worth it or Not?
9 Insanely Helpful Tips to Plan a Disney Vacation

Shelley has been going on Walt Disney World trips since she was a toddler growing up in South Florida. Since then, she has expanded her interests and passion to include Disneyland and runDisney trips. She is a Disney College of Knowledge-certified Travel Planner, runner, Physician, mom of three, and all-around Disney fan. She believes the magic is in the details of any Disney or runDisney trip!



Happy to answer questions in the comments!